Which Lightroom Profile Should You Use Across Multiple Cameras?
Why do Lightroom edits look different across cameras? Learn why Adobe Color is the best profile baseline for consistent multi-camera editing.
If your new camera does not take your edit the same way as your old one, the Lightroom profile is one of the first things to check.
For most working photographers, the best baseline is Adobe Color.
It is the current default profile for colour raw files in Lightroom and Adobe Camera Raw. It gives a balanced Adobe rendering before your own edits, presets, or workflow tools are applied. For photographers using multiple bodies, changing systems, working with second shooters, or building a repeatable studio workflow, Adobe Color is usually the most practical place to start.
While all sensors are different, Adobe engineer the Adobe Color profile to give photographers a starting point for editing that is as close to sensor invariant as possible. In this article, we will explore how this differs from “Camera Standard” (and what that tries to achieve), as well as what Adobe Standard is, and when that should be used.
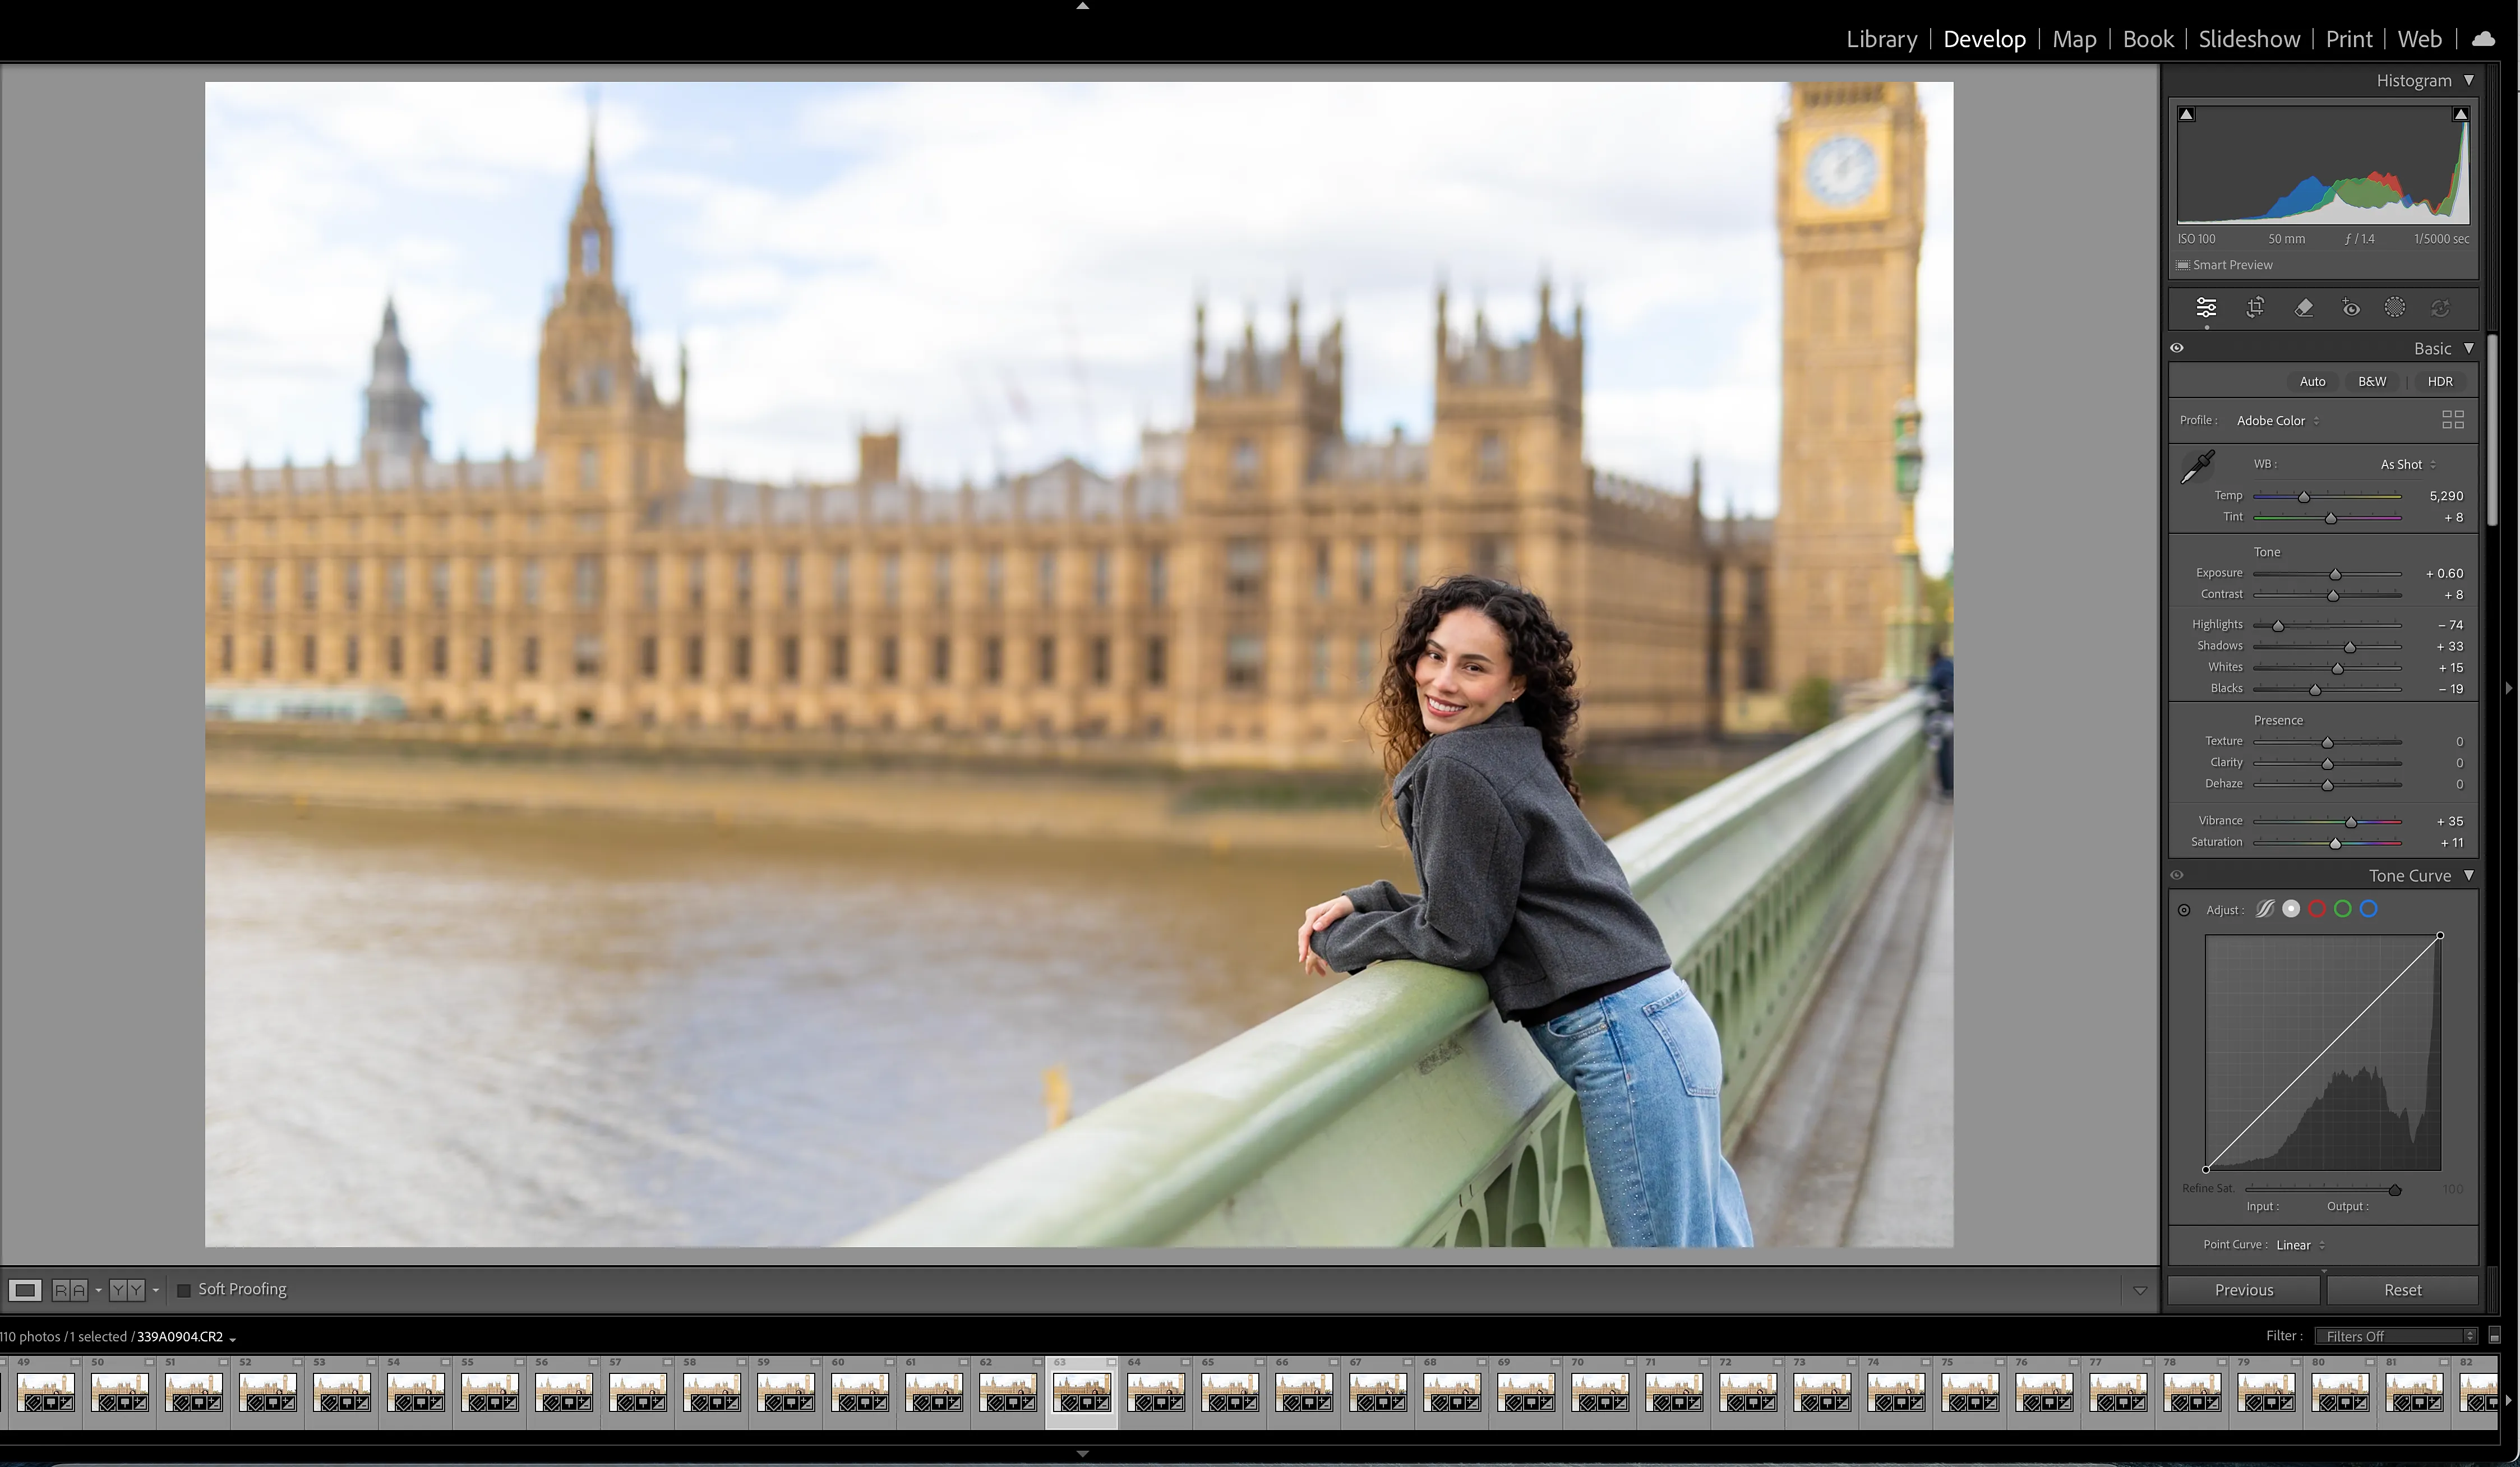
What Lightroom profiles do
A Lightroom profile is the first visible interpretation of the file before your normal Develop adjustments begin.
It affects the underlying colour and tone response. A preset then works on top of that profile. This is why two files can have the same preset applied and still not match: the preset may be identical, but if the profile used to treat the RAW image is different, the result will be different. This is the problem Adobe solve with Adobe Color, all RAW images are moved to a starting point that should look the same.
This becomes important when you consider the profile “Camera Standard” and what Adobe is trying to achieve with this. They are trying to match the manufacturer’s style.
As an example, Camera Standard for a Canon R5 and Camera Standard for a Canon R6 are not one shared profile applied identically to both cameras. They are camera-matching profiles created for specific camera models. The goal Adobe has with these profiles is to match what appears on the back of the camera screen, or the camera’s JPEGs.
That becomes important when you compare files from different camera bodies. A Canon R5 and Canon R6 may sit close together in the same system, but Lightroom still treats them as different camera models. A Nikon body, Sony body, Fuji body, or older DSLR increases that difference further.
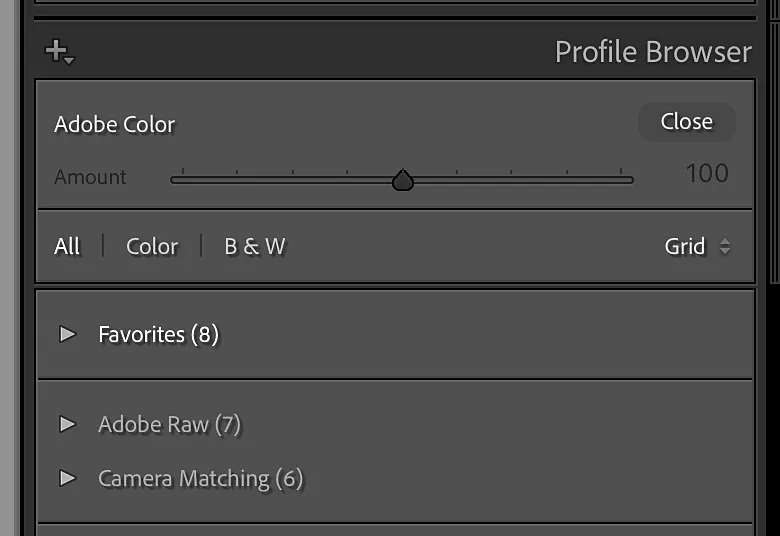
Camera Standard and Camera Matching profiles
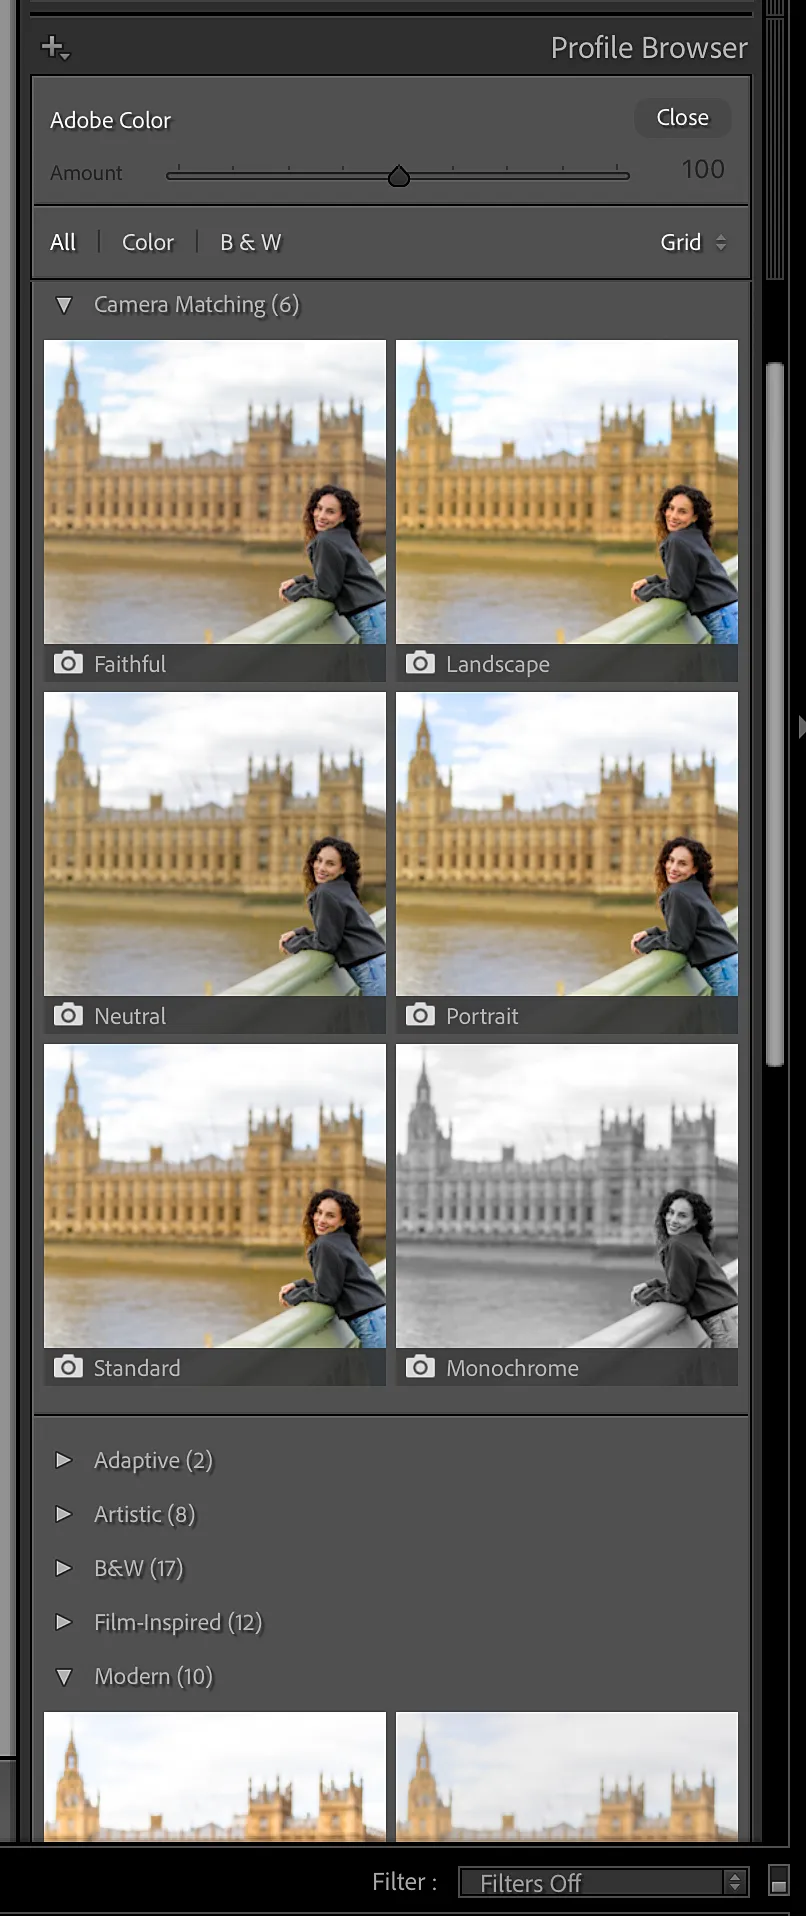
Camera Standard usually appears inside Lightroom’s Camera Matching profile group, alongside profiles such as Camera Portrait, Camera Landscape, Camera Neutral, and Camera Vivid.
These profiles are designed to approximate the camera manufacturer’s own picture styles or in-camera rendering. They are useful when you want the raw file in Lightroom to look closer to the JPEG preview or rear-screen image from that specific camera.
That is why Camera Standard can be a poor baseline for cross-camera consistency. It is useful when the goal is to keep the camera manufacturer’s look. It is less useful when the goal is to make different bodies, photographers, or shoots have the same end aesthetic, which is normally the goal for professional photographers.
Adobe Color
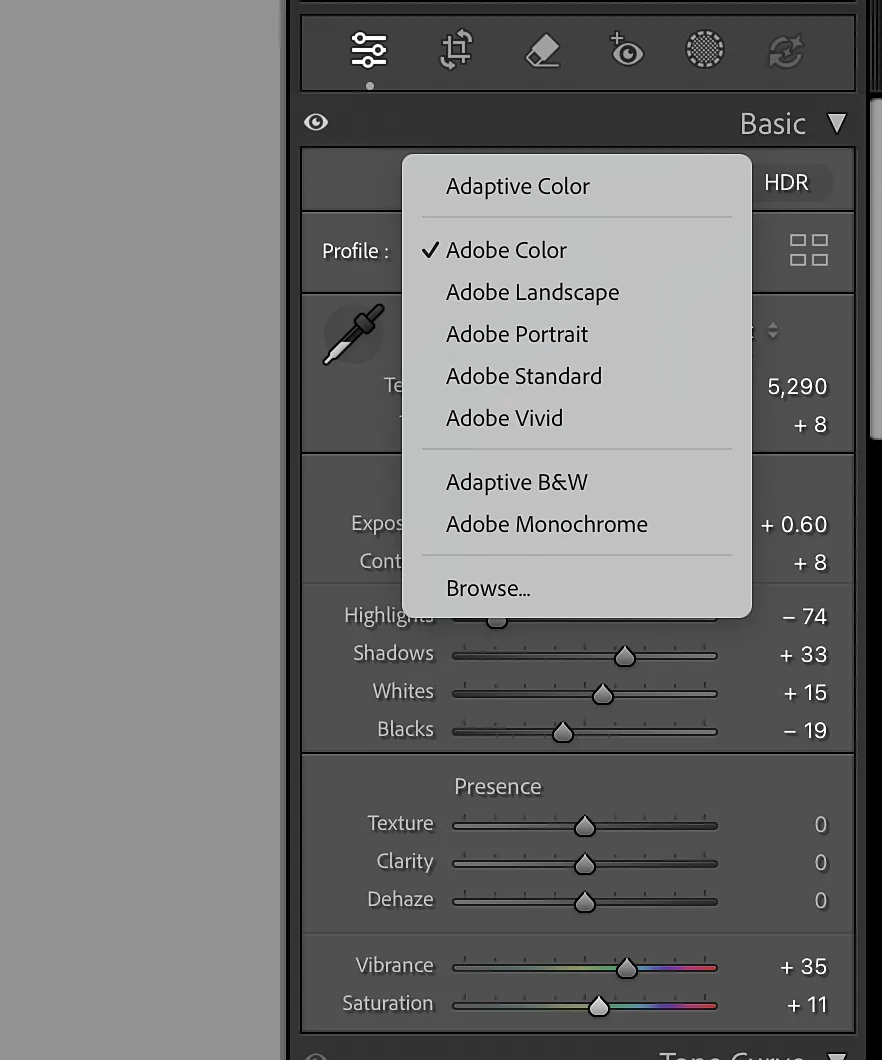
Adobe Color is Adobe’s current general-purpose default for colour raw files.
It is designed to give a balanced starting point for colour and tone before you begin editing. It is not trying to mimic Canon Standard, Nikon Picture Control, Sony Creative Look, or any other camera manufacturer’s JPEG style. It is Adobe’s own rendering.
For most photographers, this is the right default because it sits in the middle of the workflow: not as flat or technical as Adobe Standard, and not as camera-specific as Camera Matching.
Adobe Color is usually the best choice when:
- You use more than one camera body.
- You recently changed camera systems or upgraded bodies.
- You work with second shooters or associate photographers.
- You use presets and want them to behave more predictably.
- You want FotoLab or another editing workflow to learn from a consistent baseline.
Adobe Color will not remove every difference between cameras, things like sensor behaviour can still differ. But it gives your edit a more stable foundation than mixing different camera-matching profiles across a job.
Adobe Standard
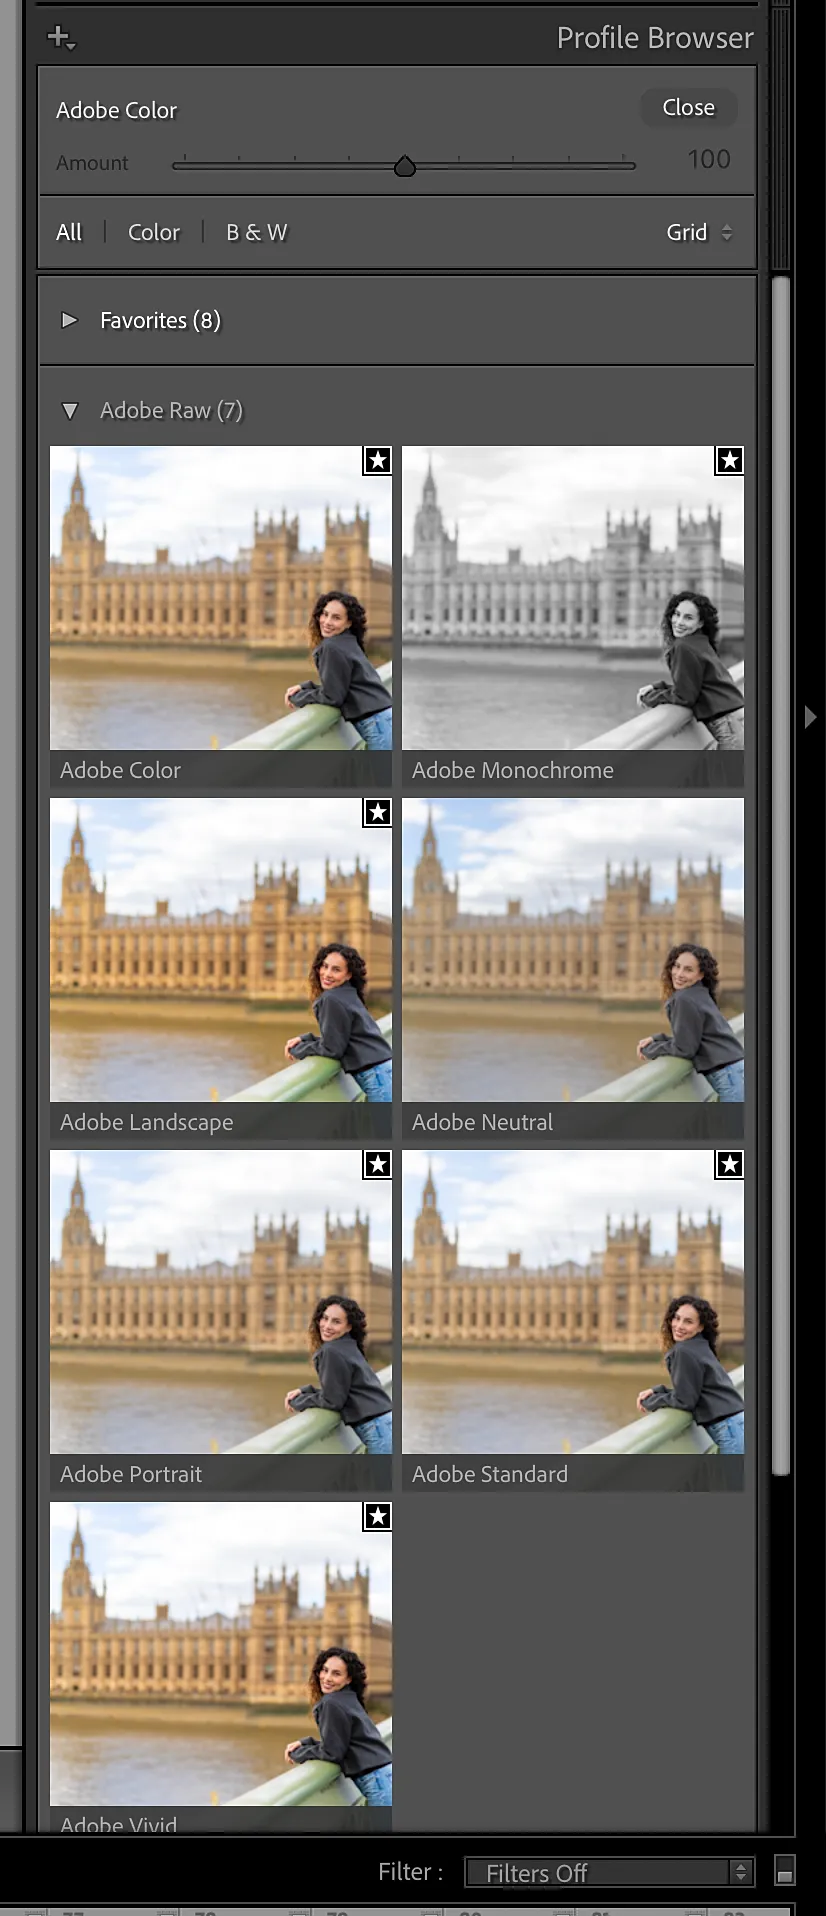
Adobe Standard is older than Adobe Color, but it still has an important role.
Adobe Standard is Adobe’s more technical baseline profile family. It is closely tied to something Adobe call “DCP”, which means DNG Camera Profile. In practical terms, a DCP is part of Adobe’s camera-specific translation layer: it helps convert the colour response of a particular camera model into Adobe’s common colour interpretation.
Adobe Standard is useful because it provides a cleaner baseline for people building profiles, LUT-based workflows, or controlled colour systems. If you are creating a custom profile, you usually want to build on the plain Adobe baseline before adding your own look.
That does not mean Adobe Standard is the best visible profile for normal editing. For most photographers, Adobe Color is the better everyday starting point.
A simple way to separate them:
- Adobe Standard is the clean technical base.
- Adobe Color is the modern Adobe default for normal editing.
- Camera Standard is a camera-matching profile designed to approximate the manufacturer’s own look.
It is worth noting that Adobe Color actually sits on top of Adobe Standard. Either of them will give you a sensor invariant starting position, but Adobe Color is likely the more comfortable starting point for most editors.
Why presets can look different on a new camera
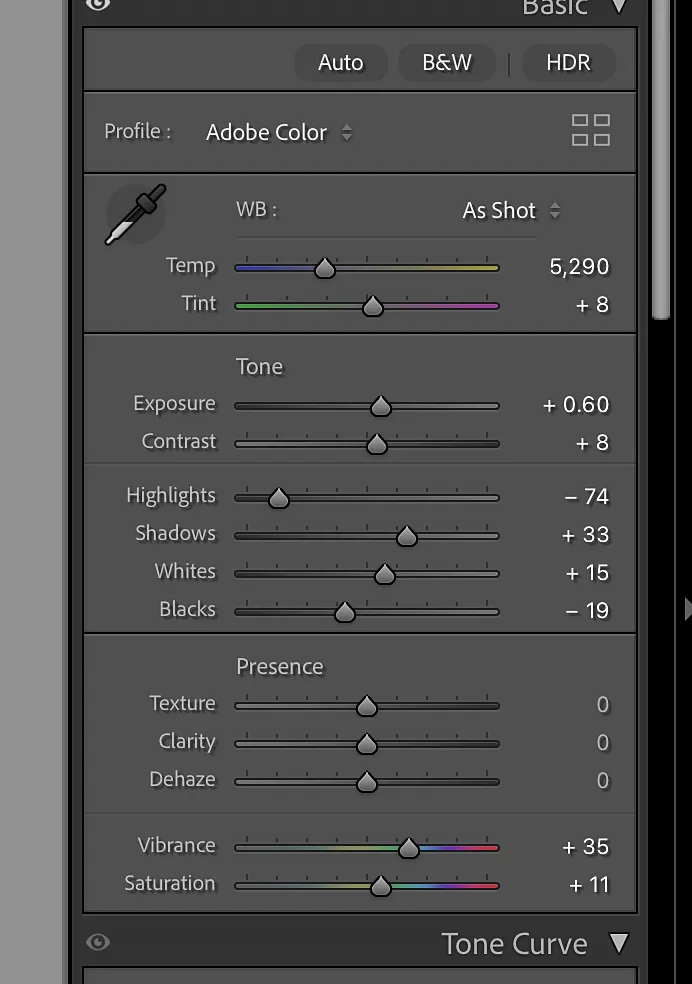
A preset records editing decisions, but it does not erase the profile underneath.
If your preset was built and tested on Adobe Color, then you apply it to files using a Camera Standard profile, the result will likely shift. If one camera body defaults to Adobe Color and another is set to a Camera Matching profile, the same preset is being applied to different foundations.
This is one reason photographers often feel that a new body does not “take” their preset in the same way. The new camera may genuinely render colour differently, but the profile can make that difference more obvious or harder to control.
Before changing the preset, check the profile.
Set both camera bodies to Adobe Color. Compare the files again. Then judge white balance, exposure, contrast, and colour response. This does not make the comparison perfect, but it removes one avoidable variable.
Which profile should you choose?
For most editing workflows, choose Adobe Color.
It is the best practical baseline for photographers who care about consistency across camera bodies, photographers, and presets. It gives you Adobe’s current default rendering without tying the edit to a specific camera manufacturer’s look.
For advanced users who are comfortable creating LUTs, or designing their own presets, Adobe Standard is an option to consider - but equally, some presets still start from Adobe Color.
Choose Camera Standard or another Camera Matching profile when you deliberately want Lightroom to resemble the in-camera JPEG look from that specific camera model.
The main point is to choose deliberately. Problems often start when a workflow mixes profiles without noticing: one body on Adobe Color, another on Camera Standard, an older catalogue using Adobe Standard, and a second shooter delivering files with something else entirely.
A practical workflow for multiple cameras
When adding a new camera body, start with the profile before judging the edit.
- Set the existing camera files to Adobe Color.
- Set the new camera files to Adobe Color.
- Apply your normal preset if you use one.
- Compare exposure, white balance, contrast, skin, greens, and shadow colour.
- Make any camera-specific refinements only after the baseline is shared.
The same principle applies to second shooters. Standardise the profile before trying to solve consistency with more preset variations.
How FotoLab uses this baseline
FotoLab is designed for photographers who need consistent editing across large sets of images, multiple cameras, or multiple photographers.
The workflow is built around your finished edits. You train FotoLab on images you have already edited, and it learns your style from that work. Training happens on your device, and editing also happens on your device.
For the cleanest results, we recommend using Adobe Color as the baseline before training and editing with FotoLab.
That gives FotoLab a consistent starting point to learn from, as you are editing in a consistent way across all camera bodies.
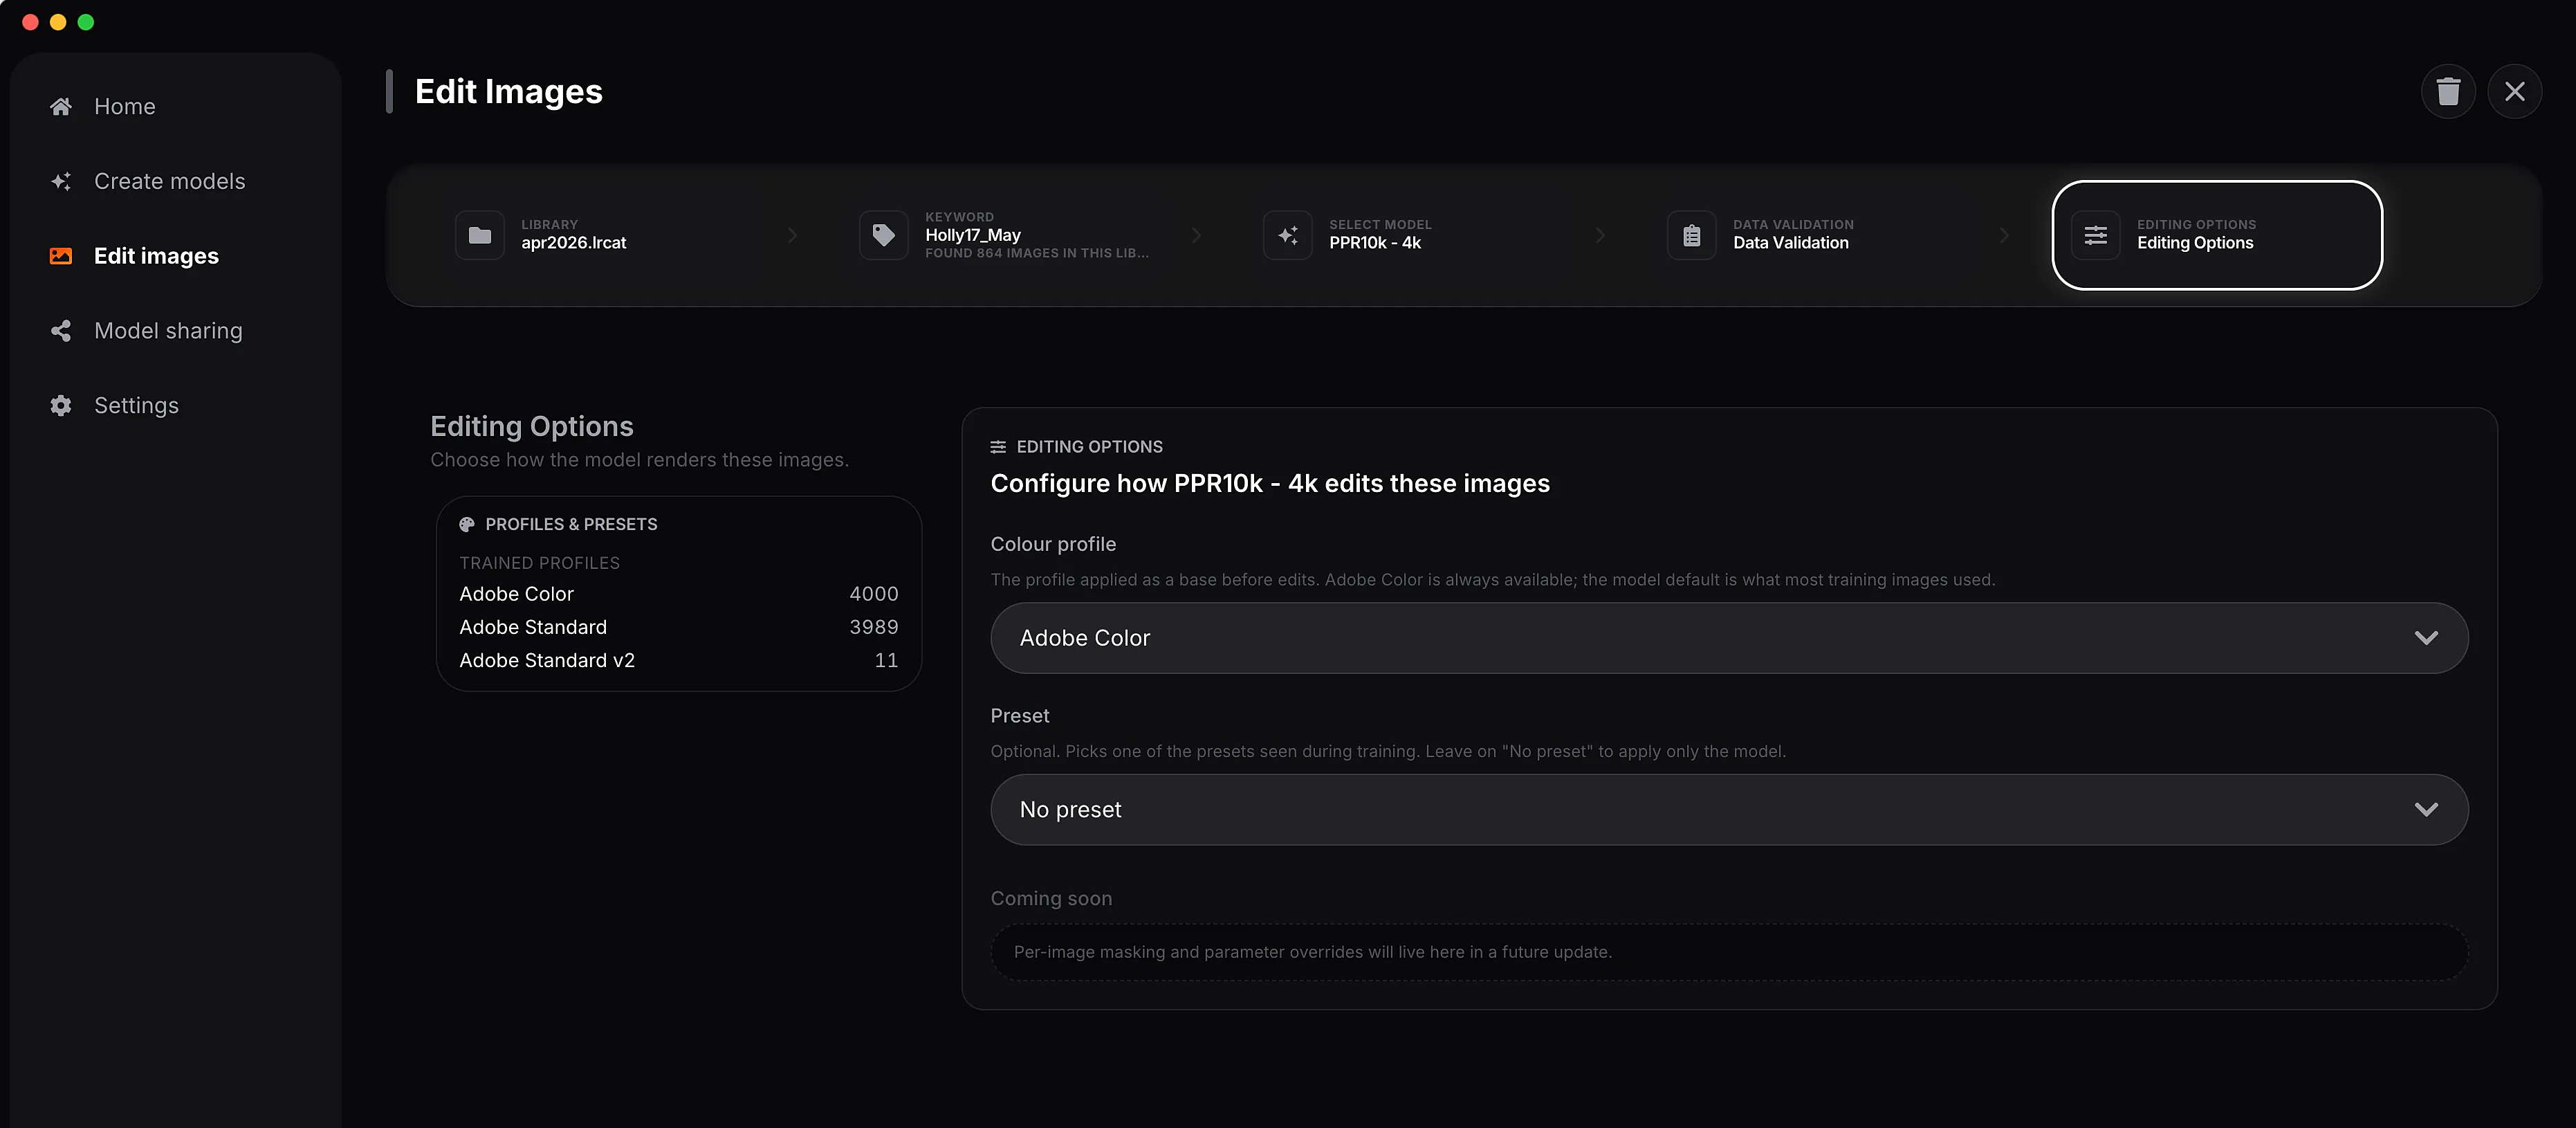
A typical FotoLab workflow looks like this:
- Start with raw files set to Adobe Color.
- Apply your normal preset if your workflow uses one.
- Edit the images as you normally would.
- Train FotoLab on those finished edits.
For editing, it is even simpler:
- Use FotoLab to apply your editing style automatically to future images.
FotoLab learns to edit exactly how you would, it can determine when to adjust exposure, shadows, or countless other parameters. While FotoLab can apply a preset for you, it is far more intelligent than a preset, and is more like having a professional editor on call 24/7, who works in minutes rather than days.
The practical answer
If your new camera looks different in Lightroom, your second shooter’s files do not match, or your preset behaves differently across bodies, check the profile before rebuilding the edit.
-
Use Adobe Color for normal editing and FotoLab workflows.
-
Use Adobe Standard for custom profile creation or technical colour work.
-
Use Camera Standard when you specifically want the camera manufacturer’s own look.
Once the baseline is consistent, presets behave more predictably, files from different bodies are easier to bring together, and FotoLab can learn your style from a cleaner foundation.